Echosync Documentation - User Guide
Start with Echosync
Section titled “Start with Echosync”What are the limits and constraints of Echosync?
Section titled “What are the limits and constraints of Echosync?”Echosync has the following limits and constraints:
- Under Windows, Echosync requires administrator rights to synchronize files locked by another process (VSS). Some features may be disabled if Echosync is started without administrator rights.
- Echosync does not keep multiple versions of the same file. It is therefore not possible to “go back in time” by retrieving a version prior to the last synchronization. However, it is possible to create multiple profiles targeting the same source folder and synchronize them alternately.
- Echosync is a unidirectional synchronization software, which means that changes always go from the source (which can be read-only) to the destination. While this approach has the advantage of simplicity, it may not meet all needs. An alternative is to create two profiles by reversing the source and destination.
In which languages is Echosync available?
Section titled “In which languages is Echosync available?”Echosync is available in French, English, Italian, Spanish, Chinese, and Dutch. By default, Echosync starts in the current operating system language if it can be determined, and in English if not.
The language used can be changed at any time in the Options / Languages menu of Echosync. Echocli also takes this setting into account for its display.
Candidates interested in helping with the translation of Echosync are invited to contact the technical support. Thanks to its volunteer users, Echosync is also available in Italian, Spanish, Chinese, and Dutch.
What is the difference between Echosync.exe and Echocli.exe?
Section titled “What is the difference between Echosync.exe and Echocli.exe?”Echosync has a graphical interface for ease of use and accessibility.
Echocli is a command-line program. It is recommended to use it with a modern command-line interpreter that supports Unicode characters, such as Terminal on Windows. Another important difference is that Echocli also runs on Linux.
How to use and update the portable version of Echosync?
Section titled “How to use and update the portable version of Echosync?”To use Echosync in portable mode, simply decompress the Echosync archive to the location of your choice (like a USB key), avoiding choosing a folder that requires administrator privileges to write to (like the Program Files folder).
The Windows version of Echosync comes with a PowerShell script for automatic updates. During the update, the old folder is renamed. You can safely delete it after making sure that the new version is fully functional.
My security software tells me that Echosync could be dangerous. What should I do?
Section titled “My security software tells me that Echosync could be dangerous. What should I do?”Windows SmartScreen and many antivirus programs consider files to be suspicious if their reputation and safety, depending on the number of downloads of the file in question, have not yet been established. This is, by definition, the case for any newly released file. The highly questionable behavior of Windows SmartScreen (which is not as smart as its name suggests) is known and seems assumed by Microsoft itself. As a result, each time Echosync is updated, and for a few days afterward, rather alarming alerts may be displayed upon installation:
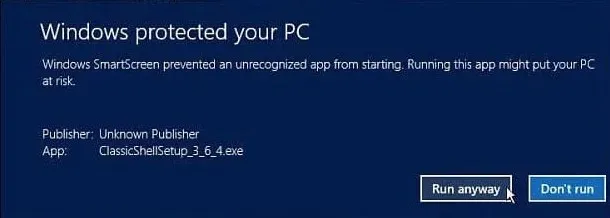
For the most zealous antivirus products on the market, the period of mistrust may even last several months, until the publisher is informed of the false positive.
If Echosync has been downloaded from a reliable source such as this site, or via the command winget install SylvainRougeaux.Echosync, this alert can be safely ignored. More cautious users can test the Echosync installation file on VirusTotal, which uses over 70 different antivirus engines.
For Windows SmartScreen, the Run Anyway button will install Echosync. As for antivirus programs, they all have options for authorizing the execution of software considered safe by the user.
A permanent solution would be to electronically sign Echosync binaries with an electronic code-signing certificate, but these are particularly expensive and have to be renewed periodically. Increases in the price of these certificates (x4 in 2023) have overcome the goodwill of Echosync’s volunteer developer.
What advanced settings are available?
Section titled “What advanced settings are available?”Some advanced Echosync or Echocli settings cannot be modified via the user interface. These settings are stored in JSON files in the application’s Profiles folder. They should be modified using a text editor (e.g. Notepad or Visual Studio Code). Only modify them if you know what you’re doing.
The following advanced settings, common to Echosync and Echocli, are available in the AdvancedSettings.json file:
- DisableCrashReporting:
trueto disable Echosync or Echocli automatic crash reporting, otherwisefalse(default value:false); - DisableTelemetry:
trueto disable automatic sending of Echosync version number, and the operating system version and language, at Echosync or Echocli startup, otherwisefalse(default value:false).
The following Echosync-specific advanced parameter is available in the GuiSettings.json file:
- CheckUpdatesOnStartup:
trueto automatically check for the availability of a new version at Echosync startup, otherwisefalse(default value:true).
Once you’ve modified the desired parameters in the JSON files, simply save them. Echosync applies the changes immediately.
Can I customize the look and feel of Echosync?
Section titled “Can I customize the look and feel of Echosync?”Echosync offers light and dark themes that follow Windows 11 conventions. Themes can be selected from the Options / Themes menu.
Synchronization profiles
Section titled “Synchronization profiles”How to create a synchronization profile?
Section titled “How to create a synchronization profile?”With the graphical user interface
The user can create a new synchronization profile after filling in the fields in the Create a new synchronization profile window, which the user can open by clicking the New… button in the top-right corner of the app. The Duplicate… button allows you to create a new profile by copying the settings from an existing profile.
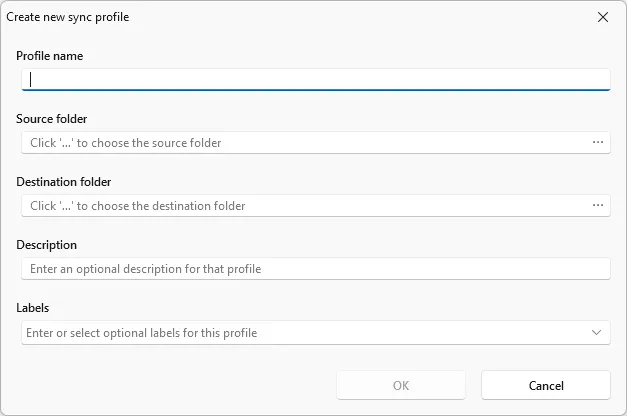
Echosync displays the list of loaded profiles, showing each profile’s name, source and destination folders, last synchronization date, status, description and labels. The name, description and labels of the profile can be modified at any time.
The desired synchronization modes can be defined directly in Synchronization actions:
- Sync new items to copy new files and folders to the destination;
- Sync deleted items to delete files and folders from the destination when they were removed from the source;
- Sync modified items, newer in the source to overwrite destination files with newer source files;
- Sync modified items, older in the source to overwrite destination files with older source files;
- Sync moved or renamed items to apply moved or renamed files and folders to the destination.
Files or folders in the source folder that should be included or excluded from synchronization can be specified using glob patterns.
With the command line
A synchronization profile can be created from the command line using Echocli’s create command, passing the desired options as parameters.
PS C:\Echocli\bin\x64\Debug> .\Echocli.exe create --help
Description:  Create a new sync profile
Usage:  Echocli create [<name> [<source> [<destination>]]] [options]
Arguments:  <name>         The sync profile name  <source>       The source folder  <destination>  The destination folder
Options:  --description <description>        The sync profile description  --create                           Copy new files and folders to the destination  --delete                           Delete files and folders removed from the source  --overwrite-older                  Overwrite destination files with newer source files  --overwrite-newer                  Overwrite destination files with older source files  --move                             Apply moved or renamed files and folders to the destination  --safe                             Equivalent to "--create true --delete false --overwrite-older true --overwrite-newer false --move true"  --mirror                           Equivalent to "--create true --delete false --overwrite-older true --overwrite-newer true --move true"  --source-filters <source-filters>  Source file and folder filters  --labels <labels>                  Filter by labels  -?, -h, --help                     Show help and usage information
For example: echocli create "Project X" C:\source D:\destination. If no option is passed as a parameter, as in this example, the --safe option is used by default.
In the example echocli create "Super Project" C:\source D:\destination --mirror --description "Mirror of SP on USB key", a synchronization profile named “Super Project” is created with the specified description, enabling all synchronization options so that the destination folder mirrors the source folder.
It is possible to create a synchronization profile interactively using the create command with no arguments or options. All you have to do is follow the prompts.
PS C:\Echocli\bin\x64\Debug> .\Echocli.exe create
[1/11] Enter a name for the sync profile: My first profile[2/11] Enter a source folder for the sync profile: C:\Source[3/11] Enter a destination folder for the sync profile: D:\Destination[4/11] Do you want to copy new files and folders from the source to the destination? [y/n] (y): y[5/11] Do you want to delete files and folders from the destination if they were deleted from the source? [y/n] (n): y[6/11] Do you want to overwrite destination files with modified source files, when the source files are newer? [y/n] (y): y[7/11] Do you want to overwrite destination files with modified source files, even when the source files are older? [y/n] (n): y[8/11] Do you want to rename or move files and folders in the destination to match the source? [y/n] (y): y[9/11] Enter the filters for selecting files and folders in the source (**/*): **/*[10/11] Enter an optional description for the sync profile (): My description[11/11] Enter optional labels for the sync profile (): Test

╭─ My first profile (3be870fc-63d0-4295-92a0-a7314796f423) ─────────────────────────────────────────────╮│                                                                                                       ││ Source folder:                            C:\Source\ → The source folder is unavailable.              ││ Destination folder:                       D:\Destination\ → The destination folder is unavailable.    ││ Description:                              My description                                              ││ Labels:                                   Test                                                        ││                                                                                                       ││ Sync new items:                           Yes                                                         ││ Sync deleted items:                       Yes                                                         ││ Sync modified items, newer in the source: Yes                                                         ││ Sync modified items, older in the source: Yes                                                         ││ Sync moved or renamed items:              Yes                                                         ││ Source file and folder filters:           **/*                                                        ││                                                                                                       ││ Last sync:                                never synced                                                ││                                                                                                       │╰───────────────────────────────────────────────────────────────────────────────────────────────────────╯The sync profiles were saved successfully.
The available sync profiles can be viewed using the list command.
PS C:\Echocli\bin\x64\Debug> .\Echocli.exe list --help
Description:  List sync profiles
Usage:  Echocli list [<profiles>...] [options]
Arguments:  <profiles>  Sync profile names to show. Wildcards (*, ?) are supported [default: *]
Options:  --no-check         Skip readiness checks for faster basic sync profile information  --labels <labels>  Filter by labels  -?, -h, --help     Show help and usage information
For example, echocli list my* displays all sync profiles whose name starts with “my”. Since the * wildcard is the default, the echocli list command displays all available sync profiles. Labels are very useful for restricting Echocli commands to a specific group of profiles. For example, echocli list --labels pro nas or echocli list --labels pro --labels nas only displays sync profiles with the label “Pro” or “NAS” (label matching is case-insensitive).
PS C:\Echocli\bin\x64\Debug> .\Echocli.exe list my*
╭─ My first profile (3be870fc-63d0-4295-92a0-a7314796f423) ─────────────────────────────────────────────╮│                                                                                                       ││ Source folder:                            C:\Source\ → The source folder is unavailable.              ││ Destination folder:                       D:\Destination\ → The destination folder is unavailable.    ││ Description:                              My description                                              ││ Labels:                                   Test                                                        ││                                                                                                       ││ Sync new items:                           Yes                                                         ││ Sync deleted items:                       Yes                                                         ││ Sync modified items, newer in the source: Yes                                                         ││ Sync modified items, older in the source: Yes                                                         ││ Sync moved or renamed items:              Yes                                                         ││ Source file and folder filters:           **/*                                                        ││                                                                                                       ││ Last sync:                                never synced                                                ││                                                                                                       │╰───────────────────────────────────────────────────────────────────────────────────────────────────────╯
Once created, a sync profile can be modified using the configure command.
PS C:\Echocli\bin\x64\Debug> .\Echocli.exe configure --help
Description:  Configure the specified sync profile
Usage:  Echocli configure [<profile>] [options]
Arguments:  <profile>  The sync profile name to configure
Options:  --name <name>                      The sync profile name  --source <source>                  The source folder  --destination <destination>        The destination folder  --description <description>        The sync profile description  --create                           Copy new files and folders to the destination  --delete                           Delete files and folders removed from the source  --overwrite-older                  Overwrite destination files with newer source files  --overwrite-newer                  Overwrite destination files with older source files  --move                             Apply moved or renamed files and folders to the destination  --safe                             Equivalent to "--create true --delete false --overwrite-older true --overwrite-newer false --move true"  --mirror                           Equivalent to "--create true --delete false --overwrite-older true --overwrite-newer true --move true"  --source-filters <source-filters>  Source file and folder filters  --labels <labels>                  Filter by labels  -?, -h, --help                     Show help and usage information
The command echocli configure test --name "new name" --safe allows, for example, to change the name of the profile “test” to “new name” and to enable modes of synchronization which are not likely to cause data loss in the destination.
Where are the synchronization profiles stored?
Section titled “Where are the synchronization profiles stored?”The synchronization profiles are stored in a JSON file named SyncProfiles.json, saved in the application’s Profiles subfolder (in portable mode) or in the %LOCALAPPDATA%\Echosync\Profiles folder (if Echosync is installed on the machine).
How to delete the synchronization profiles?
Section titled “How to delete the synchronization profiles?”With the graphical user interface
Selected profiles (Ctrl + click for a non-contiguous multiple selection, and Shift + click for interval selection) can be deleted by clicking the Delete button.
Deleting a synchronization profile does not delete any files.
With the command line
Sync profiles can be removed with Echocli’s remove command, passing their names or labels as parameters. Wildcards used in profile names are correctly interpreted.
PS C:\Echocli\bin\x64\Debug> .\Echocli.exe remove --help
Description:  Remove the specified sync profiles
Usage:  Echocli remove [<profiles>...] [options]
Arguments:  <profiles>  Sync profile names to remove. Wildcards (*, ?) are supported
Options:  -f, --force        Remove sync profiles without confirmation  --labels <labels>  Filter by labels  -?, -h, --help     Show help and usage information
For example, to delete the profile “My profile”:
PS C:\Echocli\bin\x64\Debug> .\Echocli.exe remove "my profile"
Do you really want to remove the sync profile "My profile"? [y/n] (n): yThe sync profile "My profile" has been successfully removed.The sync profiles have been saved successfully.
How do I specify which files or folders in the source folder should be included or excluded from synchronization?
Section titled “How do I specify which files or folders in the source folder should be included or excluded from synchronization?”You can specify which files or folders in the source folder to include or exclude from synchronization by defining filters based on “glob” patterns. These filters can be combined to create very specific synchronization profiles. Here is an overview of the syntax of glob filters:
*(asterisk): matches zero or more characters in a single path segment (does not cross folder separators). Example:*.jsmatches all files ending with “.js” in the source directory.**(double asterisk): matches zero or more directory levels. It is used to perform a recursive match. Example:src/**/*.tsmatches all “.ts” files in the “src” folder and its subfolders, regardless of the depth of the tree structure.?(question mark): matches any single character (in a path segment). Example:file?.txtmatches the files “file1.txt” and “fileA.txt” but not “file12.txt”.[abc](character class): matches any character listed. Example:file[ab].txtmatches the files “filea.txt” or “fileb.txt”. It can be inverted with the negation character!placed at the beginning of the class, for example[!abc].[a-z](range): matches a character in the specified range (in this case, all letters from a to z). It can be inverted with the negation character!placed at the beginning of the range, for example[!a-z]. Intervals can be combined in the same pattern, for example[0-9A-Z].
Echosync determines whether the filter matches a file or a folder based on whether or not there is a folder separator (/ or \) at the end of the pattern. For example, the pattern !**/Temp/ will exclude all folders named “Temp” and their contents, while !**/Temp will exclude all files named “Temp”, regardless of their parent folder.
The default pattern, which includes everything recursively, is **/* or, more simply, **.
To define an exclusion filter, simply prefix the pattern with the negation character !. For example, the pattern !**/*.tmp excludes all “.tmp” files, regardless of their parent folder. It is also possible to specify an absolute path to the folder or file to be excluded, for example !C:/Absolute/Path/Folder/ or !C:/Absolute/Path/File.txt.
Exclusion filters take precedence over inclusion filters. Thus, if a file matches both an inclusion filter and an exclusion filter, it will be excluded from synchronization.
The case sensitivity of filters depends on the operating system on which Echosync is running; filters are case sensitive on Linux and case insensitive on Windows.
How to synchronize from or to a folder on a smartphone under Windows?
Section titled “How to synchronize from or to a folder on a smartphone under Windows?”By connecting the smartphone in UMS mode
The easiest way to access the memory (internal or memory card) of a smartphone is to “mount” it on the computer in UMS mode (USB mass storage device class). Thus, access to the smartphone’s memory is done in the same way as any other drive such as a USB key, either with the Windows file explorer or Echosync.
Unfortunately, the UMS mode is less and less available on recent smartphones, in favor of the much more limited MTP mode (Media Transfer Protocol): access to media files only, no mount point for universal and standard access, etc. So you’ll have to find a way to access more freely to the smartphone files.
Using the mobile application Link with Windows
Microsoft has integrated a feature into Windows 11 that allows seamless access to a smartphone’s folders and files from within file explorer. To activate this feature, go to Settings, Bluetooth and devices, Mobile devices and Manage devices. An option will make the smartphone’s files visible in the file explorer and therefore in Echosync.
Using a WebDAV server on the smartphone
Finally, it is possible to use the WebDAV protocol to access files on the smartphone. This requires the smartphone to be connected to the same network as the computer running Echosync. The smartphone must therefore be connected via WiFi to your local network. Next, you’ll need to set up a WebDAV server on the smartphone. Several are available from mobile app stores. Once the WebDAV server is up and running, please note the address of the file server. Let’s take the example of a server available at the address http://192.168.1.18:8080. To access this file server from a Windows application, rewrite the URL address as \\[IP_ADDRESS]@[PORT]\DavWWWRoot, in this case \\192.168.1.18@8080\DavWWWRoot. Simply complete the path with the names of the folders and subfolders making up the targeted tree structure, e.g. \\192.168.1.18@8080\DavWWWRoot\DCIM\Camera to access the files and subfolders contained in the DCIM\Camera folder. The full path can be used in Windows File Explorer or Echosync, as a source or destination folder.
Folder comparison and synchronization
Section titled “Folder comparison and synchronization”How to launch a comparison or synchronization operation?
Section titled “How to launch a comparison or synchronization operation?”With the graphical user interface
The Compare and Synchronize buttons are used to launch the comparison, and then if necessary the synchronization, of the selected profiles.
The Pause and Cancel buttons are used to pause or cancel the current operation.
The result of the comparison is immediately displayed to the user, by showing a future view of the destination folder.

With the command line
The Echocli commands compare and sync are used to compare and synchronize the sync profiles whose names and labels are passed as parameters. Wildcards used in profile names are correctly interpreted.
It is possible to interrupt the current operation by sending the SIGINT signal with the Ctrl + C key combination. The current operations are then canceled cleanly.
The result of the comparison is immediately shown to the user by displaying a future view of the destination folder in the console.
PS C:\Echocli\bin\x64\Debug> .\Echocli.exe compare "test - basique"
╭─ Test - Basique (fe91d2ff-48ac-4f8d-a392-a7d28e8497e0) ──────────────────────────────────────────────────────────────────────╮│                                                                                                                              ││ Source folder:                            D:\Temporaire\Development\Tests Echosync\Sync\Source\                              ││ Destination folder:                       D:\Temporaire\Development\Tests Echosync\Sync\Destination\                         ││ Description:                              Test                                                                               ││ Labels:                                   test3, Test, Test2                                                                 ││                                                                                                                              ││ Sync new items:                           Yes                                                                                ││ Sync deleted items:                       Yes                                                                                ││ Sync modified items, newer in the source: Yes                                                                                ││ Sync modified items, older in the source: Yes                                                                                ││ Sync moved or renamed items:              Yes                                                                                ││ Source file and folder filters:           **/*                                                                               ││                                           !**/Folder/*.txt                                                                   ││                                                                                                                              ││ Last sync:                                21 days ago (17/05/2026 22:49:53)                                                  ││ Sync log:                                 D:\Home\Important\Development\Profiles\fe91d2ff-48ac-4f8d-a392-a7d28e8497e0.log    ││                                                                                                                              │╰──────────────────────────────────────────────────────────────────────────────────────────────────────────────────────────────╯
📂 D:\Temporaire\Development\Tests Echosync\Sync\Destination├── 📄 A supprimer.txt → Missing file to delete (1 KB, 14/08/2024 02:05:54)├── 📄 Fichier modifié 1.txt → Newer file to copy (1 KB ↔ 1 KB, 14/08/2024 02:17:01 ↔ 14/08/2024 02:15:55)├── 📄 Fichier modifié 2.txt → Older file to copy (1 KB ↔ 1 KB, 14/08/2024 02:16:20 ↔ 14/08/2024 02:16:48)├── 📄 Fichier système.txt → New file to copy (1 KB, 14/08/2024 10:37:58)├── 📂 Folder│   └── 📄 Fichier renommé (vieux nom).txt → Missing file to delete (1 KB, 14/08/2024 02:14:20)└── 📄 Nouveau fichier.txt → New file to copy (1 KB, 14/08/2024 02:13:34)
╭──────────────────────────────────────┬───────┬──────────╮  ╭─ Source ─────────────╮  ╭─ Destination ─────────────╮│ Action                               │ Count │     Size │  │                      │  │                           │├──────────────────────────────────────┼───────┼──────────┤  │ Total size: 62 bytes │  │ Free space: 527,26 GB     ││ File or folder to rename or move     │     0 │   0 byte │  │                      │  │                           ││ Missing file or folder to delete     │     2 │ 16 bytes │  ╰──────────────────────╯  │ Required space: -21 bytes ││ Newer file to copy                   │     1 │ 44 bytes │                            │                           ││ Older file to copy                   │     1 │ 18 bytes │                            ╰───────────────────────────╯│ New file to copy or folder to create │     2 │   0 byte │╰──────────────────────────────────────┴───────┴──────────╯
What kind of difference does Echosync detect?
Section titled “What kind of difference does Echosync detect?”Echosync proceeds by comparison, detecting the following differences:
- Sync new items: files and folders that are not found in the destination but are present in the source will be copied to the destination.
- Sync deleted items: files and folders that are not found in the source but are still present in the destination will be deleted from the destination. Caution: this operation may result in data loss.
- Sync modified items, newer in the source: files that are present in both the source and destination, but whose modification date in the source is newer than in the destination, will be overwritten in the destination.
- Sync modified items, older in the source: files that are present in both the source and destination, but whose modification date in the source is older than in the destination, will be overwritten in the destination. Caution: this operation may result in data loss.
- Sync moved or renamed items: identical files that are present in both the source and destination, but whose path differs because they have been renamed or moved in the source, will be moved and/or renamed in the destination. Read-only and hidden file and folder attributes that have changed in the source will be synchronized in the destination, even if the file or folder has not been renamed or moved.
Why are my files in Windows identified as different when they have not been modified?
Section titled “Why are my files in Windows identified as different when they have not been modified?”Echosync relies on file modification dates to identify files that need to be updated. However, not all file systems have the same accuracy in time stamping and rounding beyond the second can occur when copying files.
For example, file timestamps on FAT drives (FAT16, FAT32, exFAT) are rounded to the nearest two seconds (even number) when the file is written to the drive. File timestamps on NTFS drives are rounded to the nearest 100 nanoseconds when the file is written to the drive. So when files are copied from an NTFS partition to a FAT partition, the file timestamp is rounded up to the next even second. This means that there can be a difference of up to 2 seconds in the date of modification of the file even though the file has not undergone any change in its contents.
This table illustrates this principle with some examples:
| NTFS file timestamp | FAT file timestamp after copy |
|---|---|
| 7 h 31 min 0 s 000 ms | 7 h 31 min 0 s 000 ms |
| 7 h 31 min 0 s 001 ms | 7 h 31 min 2 s 000 ms |
| 7 h 31 min 1 s 000 ms | 7 h 31 min 2 s 000 ms |
| 7 h 31 min 1 s 999 ms | 7 h 31 min 2 s 000 ms |
Similarly, the NTFS file system stores time values in UTC format, so they are not affected by changes in time zone or daylight saving time. The FAT file system stores time values based on the local time of the computer. For example, a file that is saved at 3:00pm PST in Washington is seen as 6:00pm EST in New York on an NTFS volume, but it is seen as 3:00pm EST in New York on a FAT volume.
While Echosync ignores millisecond differences by default, a difference of one second or more is considered a potential change. Therefore, it is recommended to avoid synchronizing folders between NTFS and FAT drives. FAT file systems that are intended to be used only under Windows will be conveniently converted or reformatted to the more efficient NTFS.
How to program the synchronizations?
Section titled “How to program the synchronizations?”Echosync does not have its own scheduler. This would have implied having a resident program in memory at all times to trigger the synchronizations, increasing memory consumption and machine startup time.
However, since synchronizations can be launched from the command line, it is relatively easy to automate synchronizations with the Windows or Linux task scheduler. It is recommended to use Echocli to schedule your synchronizations, although this is also possible with Echosync.
With the command line
The launching of synchronization operations with Echocli is documented above.
With the graphical interface
It is possible to give profile names as arguments to the Echosync executable, with wildcards correctly interpreted (e.g. NAS* will launch the synchronization of all profiles starting with “NAS”). If profile names contain spaces, they should be surrounded with quotation marks when passed as arguments to Echosync.
Example: Echosync.exe NAS* profile1 "profile 2"
To synchronize all profiles with the “NAS” or “Pro” label, launch Echosync with the following command: Echosync.exe * /label:nas /label:pro
It is possible to start Echosync in “silent” mode. This mode hides the splash screen and automatically minimizes the program window to the taskbar. To do this, just pass the /silent argument on the command line.
It is also possible to define the Echosync behavior at the end of the synchronization operations.
How to detect synchronization errors?
Section titled “How to detect synchronization errors?”Even after closing the program, it is possible to consult the synchronization log to check that the comparison and synchronization operations have been carried out correctly. Please note that if the size of the synchronization log exceeds 5 MB, it will be renamed (adding a timestamp in brackets) and a new log file will be created.
The flag color displayed in the Last sync column of the profiles table indicates the result of the last synchronization:
- blue: no synchronization has been run yet, or the result of the last synchronization could not be determined from the log;
- red: an error occurred during the last synchronization;
- green: no error occurred during the last synchronization.
With the graphical interface
The Status column of the comparison report mentions, if applicable, the reason why the synchronization of an element could not be completed successfully.
It is possible to consult the log of previous operations by clicking the View command in the Sync log section.
With the command line
Any errors occurring during synchronization operations will be displayed in the console.
The location of the operation log is specified each time the Echocli commands list, compare and sync are used.
Can we launch the synchronization or the comparison of several profiles simultaneously?
Section titled “Can we launch the synchronization or the comparison of several profiles simultaneously?”If several profiles are selected in Echosync, or specified as parameters in Echocli, when the comparison or synchronization is started, the operations are performed sequentially. In Echosync, the status of the profiles mentions the delayed start of a comparison or synchronization operation.
Parallelizing operations is rarely beneficial in terms of performance. Indeed, there is no point in launching several synchronizations simultaneously if the maximum read/write rate of the storage medium used is reached or if the bandwidth of the connection used (USB 2 in particular) is saturated.
How to program the shutdown of the PC or the closing of Echosync at the end of the synchronization operations?
Section titled “How to program the shutdown of the PC or the closing of Echosync at the end of the synchronization operations?”With the graphical interface
The Options / After synchronization menu allows you to choose an action to be performed once the synchronization operations are completed: shut down the computer, put it in hibernation or close Echosync (unconditionally or only if no error occurred during synchronization).
The automatic shutdown of the PC, the hibernation of the PC or the closing of Echosync can also be programmed from the start of the software by adding respectively the argument /shutdown, /hibernate, /exit or /exitonsuccess to the command line.
With the command line
Echocli does not have any specific option for automatically shutting down the PC at the end of synchronization operations. However, as Echocli is a command line program, it is possible to call the Windows tool shutdown.exe, or the Linux shutdown command, after Echocli in a shell script.
How can I automatically execute actions before or after a synchronization operation?
Section titled “How can I automatically execute actions before or after a synchronization operation?”Echosync does not allow you to specify commands to be executed before or after a synchronization, such as closing or starting third-party software. However, it is possible to create a script in the language of your choice (e.g. PowerShell) which will itself call Echocli at the appropriate time with the right parameters.
Some files have been deleted by mistake due to incorrect handling. What can I do?
Section titled “Some files have been deleted by mistake due to incorrect handling. What can I do?”Echosync is a file synchronization software, not a data backup software, in the sense that it does not allow you to restore a previous version of a file in the event of an error that has led to data loss.
Note that files deleted by Echosync do not go into the recycle bin.
In the absence of a backup of lost data, it is always possible to attempt to use data recovery tools, such as Microsoft’s Windows File Recovery.